

Flashing an LED is one of the most basic projects to get started with when learning about the Arduino platform, in this example we will use 8 LEDs. This is for future examples as well, we also used red, yellow and green colours (UK traffic lights) but again this is user preference. There is an onboard LED and resistor connected to Pin 13 but I’d rather go to a tiny bit of effort and either use an external resistors and LEds on a breadboard or as i tend to do I create little prototype boards with basic electronic circuits on them, you’ll see this in a photograph later of the test board I have
You will need the following, I recommend purchasing one of the basic arduino starter kits (link at the bottom) which usually contain an Arduino Uno, a breadboard and a few electronic components like resistors, LEDs, capacitors, transistors to get you going
Parts List
1 x Arduino UNO
8 x Leds
8 x 220ohm resistors
Connecting cables
Breadboard – if required
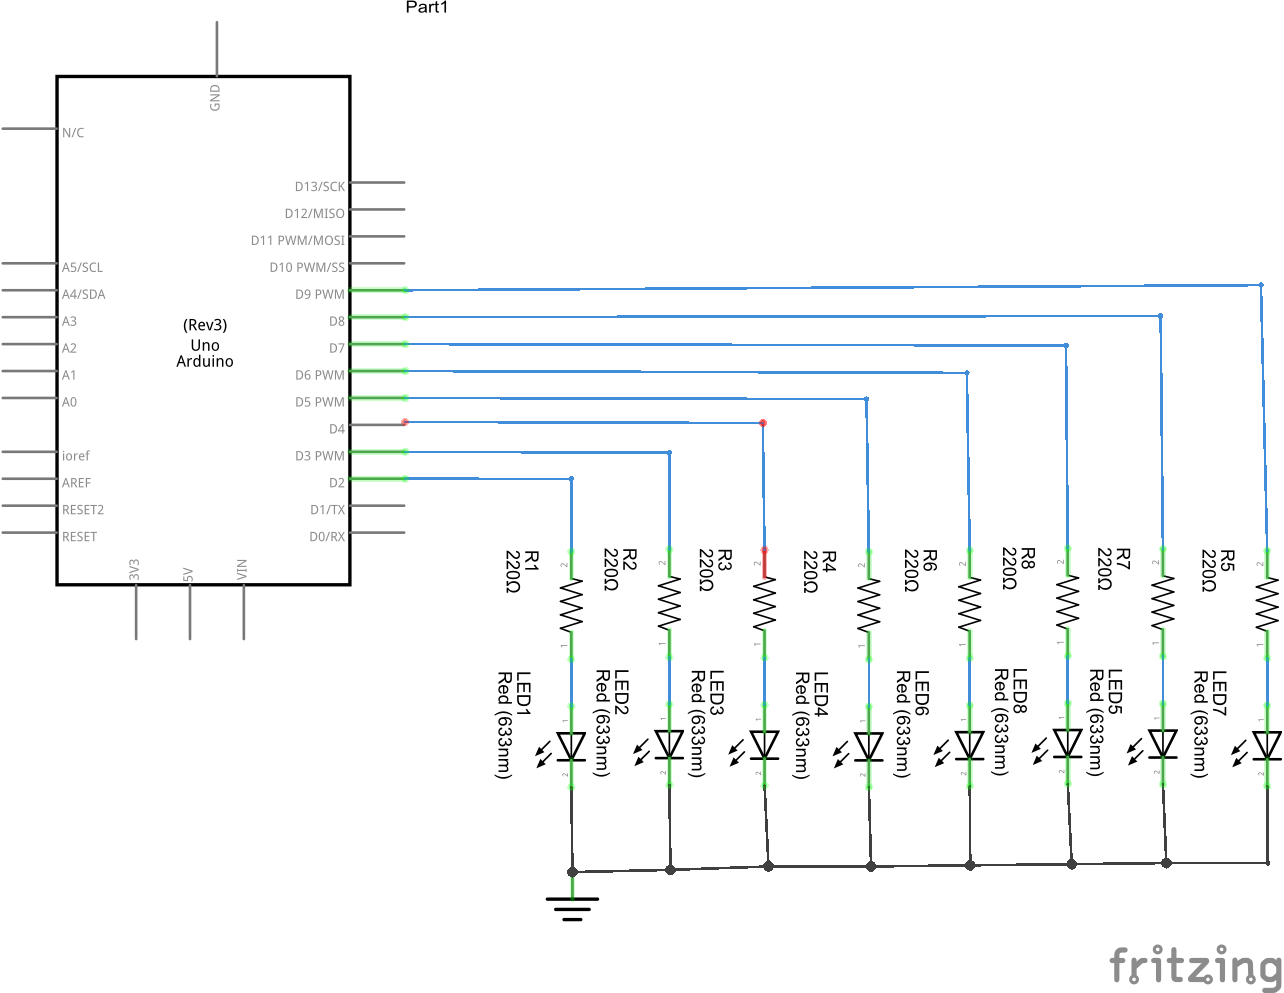
Schematic
Here is the schematic, as you can see we used digital pins 2 to 9
Arduino and LEDs
In the picture below you can see our Arduino Uno (with a sensor shield fitted) connected to a prototyping board with the resistors and LEDs fitted and all connections made
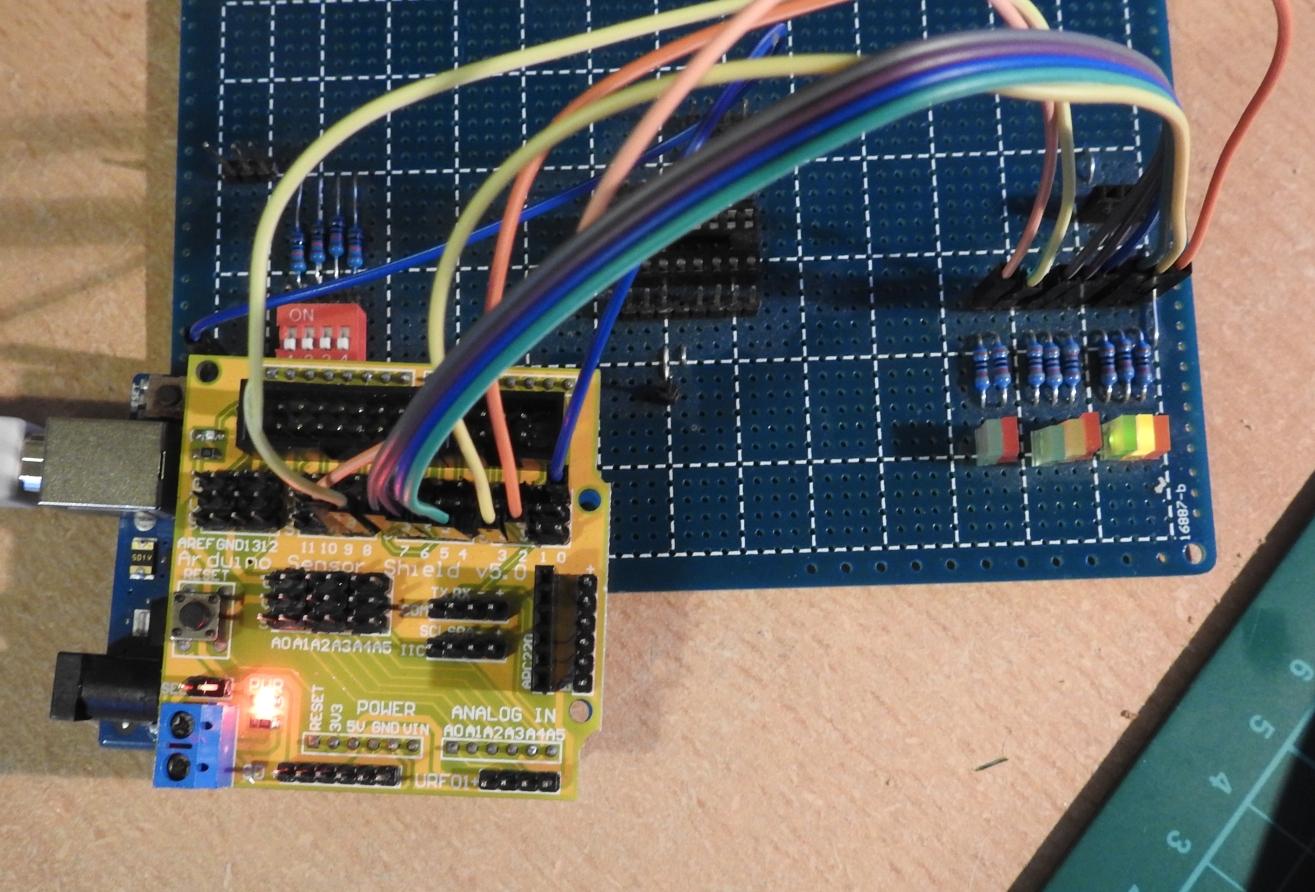
Arduino and LEDs
Code examples
The setup() function is called when a sketch starts. Use it to initialize variables, pin modes, start using libraries, etc. The setup function will only run once, after each powerup or reset of the board.
After creating a setup() function, the loop() function does precisely what its name suggests, and loops consecutively, allowing your program to change and respond as it runs. Code in the loop() section of your sketch is used to actively control the board.
In the example below we will initiliaze the 2 as an output pin, then in the loop we will toggle the led high (the led lights), delay for 1000 milliseconds, toggle the led low (the led does not light) and then delay again. Since this is in the loop theis will run continously.
Start up the Arduino IDE, a barebones sketch will appear, delete everything and enter the following
[codesyntax lang=”cpp”]
/*
* Blink an LED example
* by mikroblog
*/
void setup()
{
pinMode(2, OUTPUT); // set pin 2 as output
}

void loop()
{
digitalWrite(2, HIGH); // set pin 2 as high or 1
delay(1000); // 1 second delay
digitalWrite(2, LOW); // set pin 2 as low or 0
delay(1000); // 1 second delay
}
[/codesyntax]
Now you can switch 2 LEDs on at the same time as follows
[codesyntax lang=”cpp”]
/*
* Blink an LED example
* by mikroblog
*/
void setup()
{
pinMode(2, OUTPUT); // set pin 2 as output
pinMode(3, OUTPUT); // set pin 2 as output
}

void loop()
{
digitalWrite(2, HIGH); // set pin 2 as high or 1
digitalWrite(3, HIGH); // set pin 2 as high or 1
delay(1000); // 1 second delay
digitalWrite(2, LOW); // set pin 2 as low or 0
digitalWrite(3, LOW); // set pin 3 as low or 0
delay(1000); // 1 second delay
}
[/codesyntax]
In later exercises we will go through some other examples, these are quite basic but can be useful for learning basic programming techniques such as loops
Links
Ultimate Starter Kit for Arduino 1602 LCD Servo Motor LED Relay RTC – This one gives you a lot, breadboards, resistors, displays, buzzers, motors and connecting cables.
Deluxe Modules for Arduino UNO R3 Starter Kit W/ LED Matrix/Motion Sensor/Breadboard/LCD/Blueooth/Motor/Servo/Keypad/Makerduino – similar to above with some more advanced parts