

Description
In this example we will show a basic example of connecting a DHT11 Temperature and Humidity Sensor to your Arduino. This is a very nice little, low cost sensor which requires only a pull up resistor to VDD. This can easily be constructed on a mini bread board and then joined up to your Arduino. using some connecting cables
The DHT sensors are made of two parts, a capacitive humidity sensor and a thermistor. There is a chip inside that does some a/d conversion and outputs a digital signal with the temperature and humidity. Again you can purchase the sensor and resistor seperately but I prefer to use a little module/breakout, there are many options available such as the one below
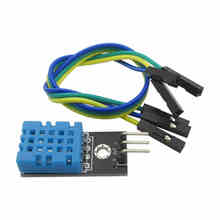 DHT11 temperature and humidity sensor module
I wont go into the technical details of the DHT11, there is a link at the bottom to a PDF datasheet which explains all you need to know.
Parts List
Label	Part Type
DHT1	DHT11 Humitidy and Temperature Sensor
Part1	Arduino Uno (Rev3)
R1	4.7k Ω
Schematic
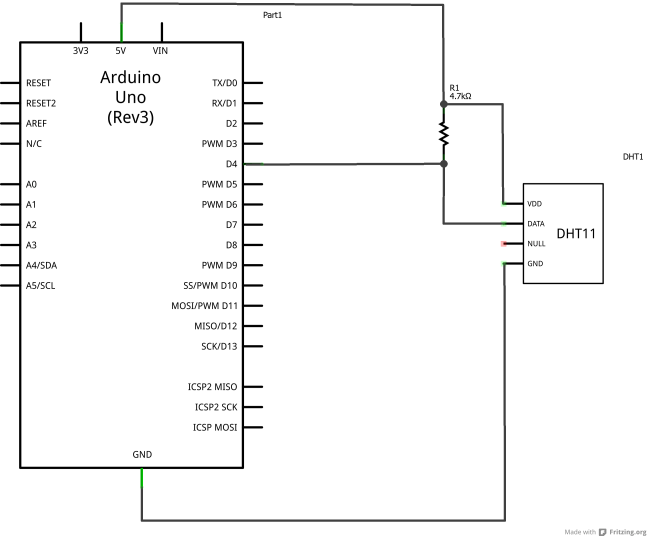
Arduino and DHT11 schematic
Breadboard layout
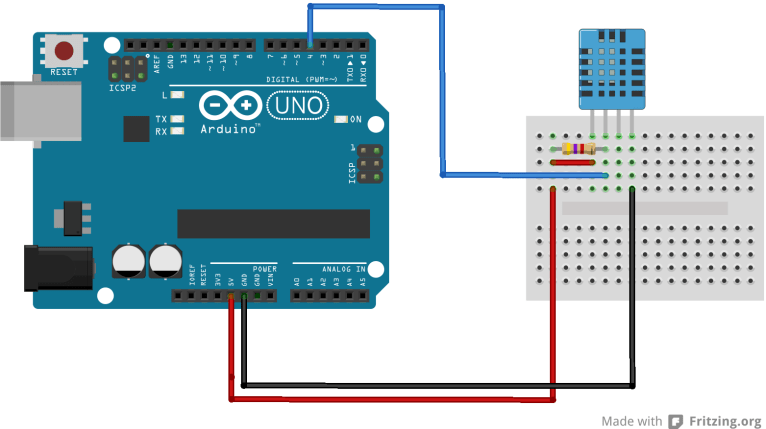
Arduino and DHT11 breadboard layout
Code
You will need either the DHT11 library from the DHT library. Download, extract and copy this to your Arduino libraries folder location.
In later versions of the Arduino IDE you can use the library manager and search for the DHT11 library from Adafruit and add it, you can see this in the screenshot below

dht11 library manager
This is a simple example which outputs the humidity and temperature, place a heat source such as your hand on the DHT11 and you will see the readings fluctuate
[codesyntax lang=”cpp”]
#include <dht11.h>

dht11 DHT;
//Pin 4 of Arduino to Data of DHT11
#define DHT11_PIN 4

void setup()
{
Serial.begin(9600);
int check;
Serial.print(“DHT11 STATUS – \t”);
check = DHT.read(DHT11_PIN);
//check status
switch (check)
{
case DHTLIB_OK:
Serial.print(“OK\n”);
break;
case DHTLIB_ERROR_CHECKSUM:
Serial.print("Checksum error\n");
break;
case DHTLIB_ERROR_TIMEOUT:
Serial.print("Timeout error\n");
break;
default:
Serial.print("Unknown error\n");
break;
}
}

void loop()
{

//humidity and temperature output
Serial.print(“Humidity is “);
Serial.print(DHT.humidity,1);
Serial.print(“\n”);
Serial.println(“Temperature is “);
Serial.println(DHT.temperature,1);

delay(1000);
}
[/codesyntax]
Output
Upload the sketch above and open the Serial Monitor window and you should see something like the following

Links
DHT11 Temperature And Relative Humidity Sensor Module
DHT11 Datasheet in PDF format