

The BMA250E is an advanced, ultra-small, triaxial, low-g acceleration sensor with digital interfaces, aiming for low-power consumer electronics applications. Featuring 10 bit digital resolution, the BMA250E allows low-noise measurement of accelerations in 3 perpendicular axes.
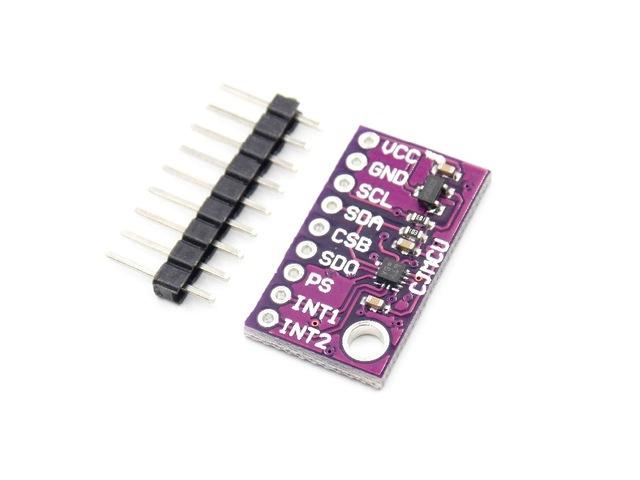
A typical module
technical Information
| Parameter | Technical data |
|---|---|
| Digital resolution | 10 bit |
| Resolution (in ±2g range) |
3.9 mg |
| Measurement ranges (programmable) |
±2 g, ±4 g, ±8 g, ±16 g |
| Sensitivity (calibrated) | ±2 g: 256 LSB/g ±4 g: 128 LSB/g ±8 g: 64 LSB/g ±16 g: 32 LSB/g |
| Zero-g offset (typ., over life-time) | ±80 mg |
| Noise density (typ.) | 400 μg/√Hz |
| Bandwidths (programmable) | 1000 Hz … 8 Hz |
| Digital inputs/outputs | SPI & I²C, 2x digital interrupt pins |
| Supply voltage (VDD) | 1.62 V … 3.6 V |
| I/0 supply voltage (VDDIO) | 1.2 V … 3.6 V |
| Temperature range | -40 … +85°C |
| Current consumption – full operation – low-power mode |
130 μA (@ 2 kHz data rate) 6.5 μA (@ 40 Hz data rate) |
| LGA package | 2 x 2 x 0.95 mm³ |
| Interrupts | – Data-ready (e. g. for processor synchronization) – Any-motion (slope) detection (e. g. for wake-up) – Tap sensing (e. g. for tap-sensitive UI control) – Orientation change recognition (e. g. for portrait/landscape switching) – Flat detection (e. g. for position sensitive switching) – Low-g / high-g detection (e. g. for shock and free-fall detection) – No-motion (e.g. for power saving) |
Connection
| Raspberry PI | Module |
| 3.3v | Vcc |
| Gnd | Gnd |
| SDA | SDA |
| SCL | SCL |
Code
This time we explore the world of Java on the Raspberry Pi
First you need to install PI4j – http://pi4j.com/install.html . I’ll sum it up as its easy to install from a terminal
The simplest method to install Pi4J on your RaspberryPi is to execute the following command directly on your RaspberryPi.
curl -s get.pi4j.com | sudo bash
Now for the java code – this is courtesy of a controleverything example, I had to change the I2C address for my module
[codesyntax lang=”java”]
// Distributed with a free-will license.
// Use it any way you want, profit or free, provided it fits in the licenses of its associated works.
// BMA250
// This code is designed to work with the BMA250_I2CS I2C Mini Module available from ControlEverything.com.
// https://www.controleverything.com/content/Accelorometer?sku=BMA250_I2CS#tabs-0-product_tabset-2
import com.pi4j.io.i2c.I2CBus;
import com.pi4j.io.i2c.I2CDevice;
import com.pi4j.io.i2c.I2CFactory;
import java.io.IOException;
public class BMA250
{
public static void main(String args[]) throws Exception
{
// Create I2C bus
I2CBus bus = I2CFactory.getInstance(I2CBus.BUS_1);
// Get I2C device, BMA250 I2C address is 0x19(25)
I2CDevice device = bus.getDevice(0x19);
// Select range selection register
// Set range +/- 2g
device.write(0x0F, (byte)0x03);
// Select bandwidth register
// Bandwidth = 7.81 Hz
device.write(0x10, (byte)0x08);
Thread.sleep(500);
// Read 6 bytes of data from address 0x02(02)
// xAccl lsb, xAccl msb, yAccl lsb, yAccl msb, zAccl lsb, zAccl msb
byte[] data = new byte[6];
device.read(0x02, data, 0, 6);
// Convert the data to 10-bits
int xAccl = (((data[1] & 0xFF) * 256) + (data[0] & 0xC0)) / 64;
if(xAccl > 511)
{
xAccl -= 1024;
}
int yAccl = (((data[3] & 0xFF) * 256) + (data[2] & 0xC0)) / 64;
if(yAccl > 511)
{
yAccl -= 1024;
}
int zAccl = (((data[5] & 0xFF) * 256) + (data[4] & 0xC0)) / 64;
if(zAccl > 511)
{
zAccl -= 1024;
}
// Output data to screen
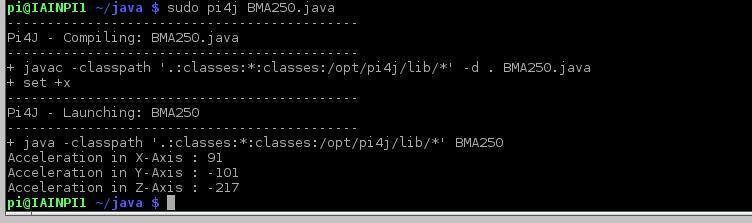
System.out.printf("Acceleration in X-Axis : %d %n", xAccl);
System.out.printf("Acceleration in Y-Axis : %d %n", yAccl);
System.out.printf("Acceleration in Z-Axis : %d %n", zAccl);
}
}
[/codesyntax]
Now you have to compile and run the program like this
$> sudo pi4j BMA250.java
Testing
You should see the following
Link
CJMCU-250E BMA250E low g three axis accelerometer sensor module MEMS