OK we are now going to look at an TSL2561 attached to the STM32 Nucleo and all development will be done on the Arduino IDE – Install STM32 support in the Arduino IDE
This TSL2561 is an I2C light-to-digital converter TSL2561 that transforms light intensity to a digital signal. The TSL2561 features a selectable light spectrum range due to its dual light sensitive diodes: infrared and full spectrum. You can switch among three detection modes to take your readings. They are infrared mode, full spectrum and human visible mode.
When running under the human visible mode, this sensor will give you readings just close to your eye feelings.
Features
Selectable detection modes
High resolution 16-Bit digital output at 400 kHz I2C Fast-Mode
Wide dynamic range: 0.1 – 40,000 LUX
Wide operating temperature range: -40°C to 85°C
Programmable interrupt function with User-Defined Upper and lower threshold settings
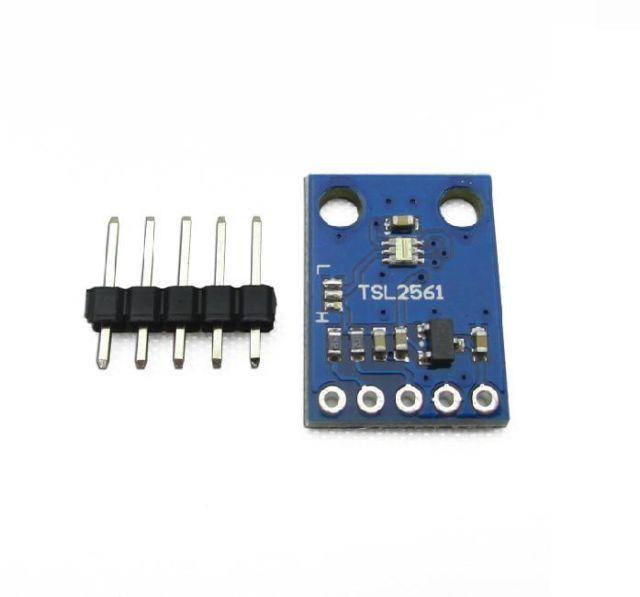
Here is a typical module that makes it easier to work with the sensor

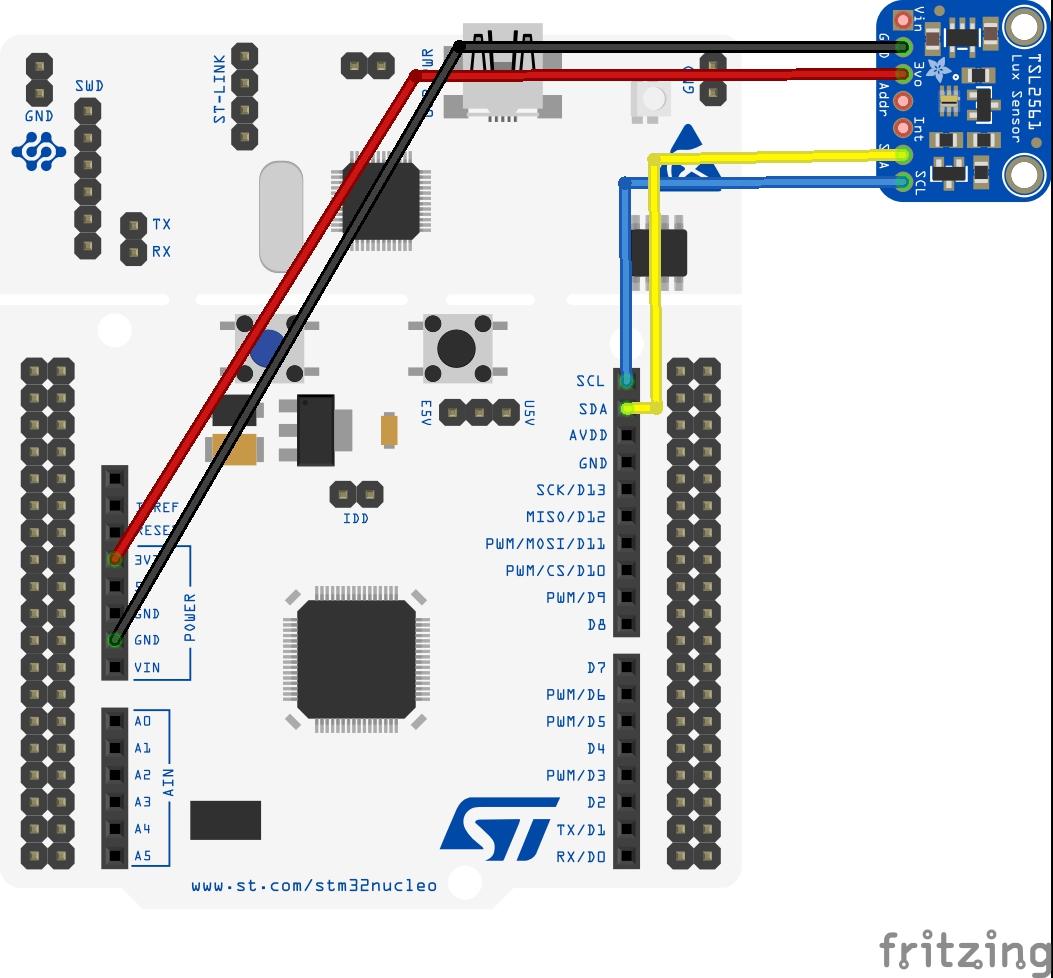
Layout and Connection
| Device Pin | STM32 Nucleo |
|---|---|
| GND | GND |
Vcc / 3.3 (or Vin on Adafruit modules) |
3.3 or 5v |
| SCL | D1 |
| SDA | D2 |
| ADDR | N/C |
| Int | N/C |
Code
We use the Adafruit TS2561 library – this is a cut down version of the default – https://github.com/adafruit/Adafruit_TSL2561
[codesyntax lang=”cpp”]
#include <Wire.h>
#include <Adafruit_Sensor.h>
#include <Adafruit_TSL2561_U.h>


Adafruit_TSL2561_Unified tsl = Adafruit_TSL2561_Unified(TSL2561_ADDR_FLOAT, 12345);


void configureSensor(void)
{
  tsl.enableAutoRange(true);            /* Auto-gain ... switches automatically between 1x and 16x */
  tsl.setIntegrationTime(TSL2561_INTEGRATIONTIME_13MS);      /* fast but low resolution */
}


void setup(void)
{
  Serial.begin(9600);
  Serial.println("Light Sensor Test");
  Serial.println("");

  /* Initialise the sensor */
  if(!tsl.begin())
  {
    Serial.print("no TSL2561 detected!");
    while(1);
  }

  configureSensor();

}


void loop(void)
{
  /* Get a new sensor event */
  sensors_event_t event;
  tsl.getEvent(&event);

  /* Display the results (light is measured in lux) */
  if (event.light)
  {
    Serial.print(event.light);
    Serial.println(" lux");
  }
  else
  {
    Serial.println("Sensor overload");
  }
  delay(500);
}
[/codesyntax]
Testing
Open the serial monitor window, mover the sensor to light sources, cover the sensor. you can see in the example below me moving to a bright light source and the value increasing
20.00 lux
22.00 lux
5.00 lux
27.00 lux
6.00 lux
38.00 lux
20.00 lux
17.00 lux
6.00 lux
19.00 lux
Links

